Spring isn’t the only peak season for moving, autumn is also known as one of the busiest times of the year for moving. Before preparing for a move, you’ll want to start decluttering in order to reduce your belongings. However, for those who have never gone through the process before, you may be wondering, “Where should I start?” or “How do I decide what to keep and what to let go of?”
In this article, we’ll share tips for decluttering in five steps. If you have too many belongings and want to declutter before moving, please use this article as a reference.
At Village House, we offer over 1,000 rental properties all across Japan at affordable prices. If you’re looking for a rental property, be sure to check out our website!
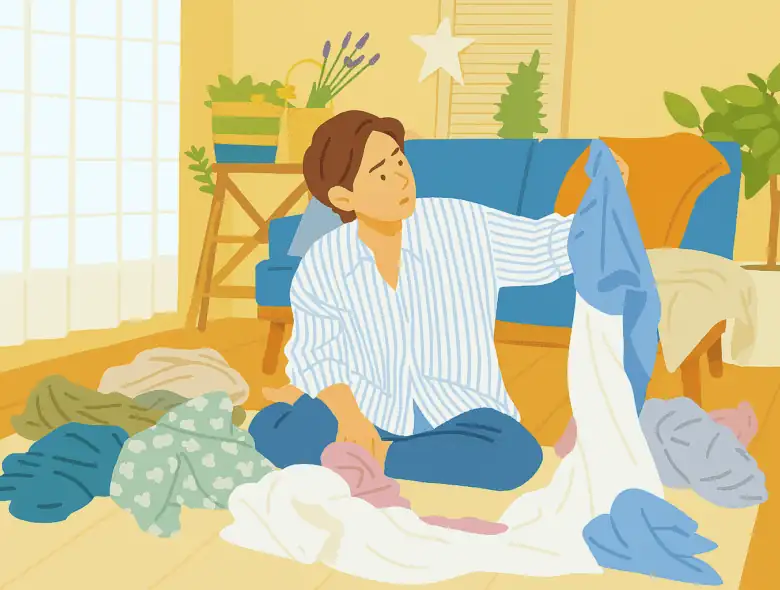
Step ①: Define the criteria for what to keep and what to let go of

An important aspect of decluttering is not to hold onto items thinking, “I might use this someday,” but rather to focus on keeping the things you actually use right now.
As a rule of thumb, if you haven’t used something in the past year, it’s unlikely that you’ll use it in the future. For seasonal items that are not used frequently, be a little more flexible and ask yourself, “Do I really need this in my current lifestyle?” This perspective will make it easier for you to make a decision.
As for sentimental items or personal favorites that you just can’t bear to part with, there’s no need to force yourself to throw them away. However, it’s a good idea to set a limit so that you don’t end up with too much stuff. If you live in a space like a studio apartment with limited storage, it’s important to only keep what fits comfortably within that space.
To make the decluttering process more efficient, prepare 3 separate containers: one for items you’ll keep, one for items you put on hold, and a trash bag for items you’ve decided to let go of. This method of sorting will make it easier for you to get things done.

Step ②: Make the most of reselling to declutter efficiently

If you have unwanted items like furniture, appliances, or clothing that are still in good condition, consider selling them through auction websites or flea market apps. Not only will this contribute to your moving costs, but it also reduces disposal fees. However, keep in mind that selling items may take time, and you’ll need to factor in platform fees and shipping costs.
When disposing of large items like furniture and home appliances, they are classified as “bulky waste” by the local municipality. To dispose of bulky waste, you’ll need to contact your local municipality’s “bulky waste collection center” online or by phone to schedule a pickup. After that, purchase a designated “bulky waste disposal sticker” from a convenience store or supermarket, and attach it to the item for collection on the scheduled day.
If you don’t have enough time to finish tidying up before the moving day, another option is to hire a professional “junk removal service.” Unlike municipal bulky waste collection, the company will come directly to your home and handle everything, from carrying the items out to loading them onto the truck. While the cost tends to be higher, it’s a convenient solution for those who don’t want to go through the hassle.
Step ③: Sort your clothes by season

When packing clothing for a move, it’s a good idea to sort items by season. When you group them by season, you can store them until the season changes, which saves you the trouble of unpacking. Additionally, be sure to label the outside of each cardboard box so you can easily see what’s inside at a glance. It’s also recommended to use different colored tapes to categorize the boxes more easily.
If you’re hesitant about storing clothes in cardboard boxes for a long time, consider placing them directly into storage containers during the packing process. You can even add mothballs or insect repellents to keep your clothes fresh. This way, once you arrive at your new home, you can place the containers directly into your closet without unpacking. Aside from items that are prone to wrinkles or losing their shape, storing them this way can significantly reduce the time and energy needed for unpacking.
Here are the steps for sorting your clothes efficiently:
Step 1: Figure out how much clothing you have
Start by emptying everything out of your closet and drawers to get a clear sense of how much clothing you actually have.
Step 2: Sort by season
Group your clothes by season: fall, winter, spring, and summer.
Step 3: Check how often you use them and their condition
Get rid of clothes you haven’t worn in over a year, as well as anything that’s worn out or no longer fits you. On the other hand, keep items you wear often and pieces you can layer.
Step ④: Prepare the right packing materials

- Cardboard boxes
It’s estimated that 15 to 20 cardboard boxes are needed per person for a move. Many moving companies offer free cardboard boxes as part of their services, but this often comes with a limit, such as up to a certain number of boxes. If you pay for additional cardboard boxes, the average price is around \200 per box. However, used cardboard boxes may be provided free of charge, so it’s a good idea to ask when getting a quote.
- Packing tape and cloth tape
Packing tape is essential for sealing and reinforcing boxes, as well as securing your belongings during the move. Nowadays, they come in a wide range of colors, so color-coding can make it easier for you to identify the contents of each box. While paper-based tape does not stick very well and can be difficult to work with, it’s better to use cloth tape instead, as it has stronger adhesion and sticks firmly.
- Newspapers and cushioning materials
Newspapers and cushioning materials are essential for preventing damage and filling gaps inside boxes. For fragile items like tableware, glassware, or home appliances, prepare some bubble wrap. These materials can be easily purchased at home improvement stores, online stores, or 100-yen shops. Some moving companies offer cushioning materials for free or for a fee, so it’s a good idea to check with them in advance.
- Scissors and cutters
Scissors and cutters are useful not only for cutting tape and string, but also for unpacking. It’s convenient to keep them on hand at all times so you can easily access them during the moving process.
Step ⑤: Label boxes to clearly identify what’s inside

Labeling each cardboard box with what’s inside will make unpacking much easier after your move. It’s recommended to use two marker colors: red and black. When labeling boxes, keep the following four points in mind:
- Box number
- What’s inside (e.g., clothing, tableware, etc.)
- Where to be placed (e.g., living room, kitchen, etc.)
- Important notes (e.g., fragile, this side up, etc.)
If you number the boxes, you’ll be able to notice in case any items go missing. Moreover, writing “Fragile” in red on items such as tableware or precision equipment will ensure that they will be handled with care, giving you peace of mind.
At Village House, there are no security deposits, key money, handling fees, or renewal fees*. If you’re looking to save on initial costs or renewal fees, please feel free to contact us!
*Depending on the contract details and screening results, a security deposit may be required.
Related articles:

Hello, I’m Machiko Doi, a freelance writer who writes about housing and living in Japan.
I live in an 80-year-old house that I inherited from my grandparents along with my two shelter cats and daughter.
We live a relaxed life while repairing the house.
I like to cook vegetables from the garden and fresh fish caught by my father, and enjoy them with cold beer on a hot day or hot sake on a cold day.